Making a Snow Globe
For this tutorial you will need the snowglobe tubes and the VM Sparkle filter. I have put them in a zip file for easy download. Download it HERE
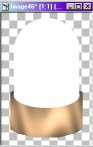
1. Open a new image with a transparent background. For the Dome globe make the image 175 x 270. For the Ball Globe make the image 195 x 250. Click on the tubes tool and choose the dome or ball globe. Which globe you use should depend on the image you are wanting to put inside of it. Click in the very center of the new image. I fyou need to move the globe around just click on the move tool and do so. You should now have this
2. Now add your text to your Globe. Click on the text tool and choose the font and size of your text. Type in your text and click OK. Position the text on the base of your globe. Now right click to unselect your text.
3. Select your Magic Wand tool and select the inner white of your globe. Keep the marching ants around this part of the globe for the whole tutorial. Go to EDIT/COPY and then EDIT/PASTE AS NEW IMAGE. Take the wand again and select the inner white of this new image to keep the ants marching. Go to SELECTIONS/MODIFY/EXPAND and set to 1, then click OK.
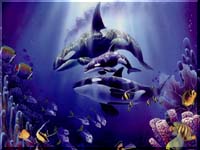
4. Open the image you want to insert into your globe. You may need to resize this image to fit into your globe ( Don't worry about excess around the edges, we will get rid of that later int he tutorial). For this tutorial I will use this image
5. Copy this image( EDIT/COPY) and then paste( EDIT/PASTE) as a new layer into your dome ball( not the one with the base on it).
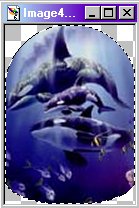
6. Click on SELECTIONS/INVERT then go into EDIT/CUT. Click on SELECTIONS/INVERT again and you should have this
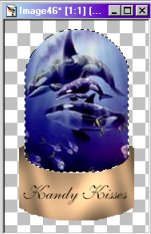
7. Now copy and paste this onto the globe with the base. Paste as New Selection. Be sure not to click your mouse now! When you move your mouse around the image should move around with it. Place the image where you want and then left click to place it. It should look like this now
Now to prepare to animate it! Make 3 copy of your globe ( SHIFT+D)
8. Now to add the sparkle. Make sure you have put the sparkle filter in your Paint Shop Pro 6/Filters folder so that you can use it. After you have done so go to IMAGE/PLUG-IN FILTERS/VM NATURAL/SPARKLE. Click OK. Do this to all three of the iages but put the sparkles in different areas of the dome for each one. Now save them as image1.psp, image2.psp and image3.psp. Be sure to go into LAYERS/MERGE VISIBLE on each image before you save it. This is very important to make sure you do before saving ech image or else the animatin will come up all wrong.
9. Now open up Animation Shop. Click on Animation Wizard. Check only transparent then click next. Ceck upper left corner and With canvas color and then click next. Check Yes REpeat the Animation and fill in how long you want the delay to be in frames. set that to 20. Click next.Now click add and add image1.psp, repeat and add image 2 and image3. Click next and then click finish. Now test your animation. If you like what you see then save it. You should have something like this
BACK